Some Sad News

final update

I am so sorry to report that we did not reach our funding goal for Crafted. For those of you new to Kickstarter, this means that none of the recorded pledges will actually be collected. I greatly appreciate all of you who contributed to this project through pledges, words of encouragement, and spreading the word about Crafted. Right now I’m going back to the drawing board, and I do not know what the next step of this project will be. This does not mean that the door is shut completely, but at this time things will not be moving forward as planned. Keep following along with me on social media, and feel free to contact me directly if you have any questions or would like to be notified if this project moves forward in the future.

Again, thank you so much for all you have done!

Kat Ammann

Announcing Crafted

I am so excited to share the news with you about my latest project! Today I would like to introduce my plan for a new subscription box made especially for creative and crafty people such as yourself. It’s called Crafted.

crafted announcement

Let’s talk craft supplies. If you’ve been here before then you already know that I am all about crafting, and when it comes to craft supplies I just can’t get enough! There is just so much out there and I want to try it all! So here I am, hopping from website to website and driving to stores big and small, always on the hunt. It’s a lot of fun, but it takes time, patience, and of course planning (especially if you want to save some money.)

What if I could share my passion for crafting, shopping, and trying new products with others? I can save you the time and effort of searching for coordinating products, introduce you to some things you may not have found otherwise and most importantly, give you more time to craft! Plus, who doesn’t love getting a package in the mail?!

Crafted Teaser

So, what exactly is Crafted?

Crafted is a bi-monthly subscription box, filled with cute and coordinated craft supplies, great for card making, scrapbooking, planner decorating, and other paper craft projects! The products in the box will be from an assortment of different brands, all carefully coordinated by me, making it easy to start your project. Each box will include a variety of supplies such as washi tape, stamps, ink, stickers, tools, glitter, and ephemera to name a few! I want each box to feel like you are receiving a gift from a friend, rather than just a boring bundle of the items you ordered. It should be just as fun to open your box as it will be to use the items!

You can subscribe bi-monthly, or pre-pay for 3 boxes (6months) or 6 boxes (1 year.) I will personally be crafting with each box released and sharing project inspiration with some tips and tricks on my blog. There will also be guest posts and projects from some of my very crafty friends, as well as a flickr gallery where subscribers can share their projects. I can’t wait to see what you will create!

Boxes will mail out by the 10th of every other month, starting in January. There will be 6 boxes annually, grouped as follows:

January/February
March/April
May/June
July/August
September/October
November/December

For some of you die hard crafters, 6 boxes a year might not be enough. Don’t worry! There will also be special edition kits and boxes available outside of the regular subscription lineup, as well as extra supplies available for purchase on the website. If you’re already a subscriber you can add any of these extra items to your box orders without paying for additional shipping!

To get this project up and running I will be launching a Kickstarter campaign later this month. There are going to be some great reward items for Kickstarter backers, so make sure you are following me on Facebook, Twitter, and Instagram so you don’t miss the official start!

Raising funds on Kickstarter will help: 

  • Buy Shipping Supplies – I need large quantities of boxes, tissue paper, and shipping labels.
  • Purchase the Products – I want to keep each box diverse so you can try all kinds of new products. This means that I need to have wholesale accounts with a variety of companies, and each one will have a minimum amount that I need to spend to place an order.
  • Build and operate a website – I’ll be setting up a brand new website, just for Crafted, where you can order your boxes and shop for some additional items. While I plan to do most of the upkeep myself, I will still need to pay monthly for hosting.
  • Advertise/Market – I would like to do some giveaways and promos with craft bloggers to help spread the word about Crafted.
  • Cover Unforeseen Expenses – I have never started a subscription box service, and while I have done a lot of research, there may be some unexpected costs along the way.


I hope you are as excited as I am about this new project! I sincerely appreciate all of your support as we lay the foundation for this creative endeavor together. Please help me spread the word and don’t hesitate to let me know what kinds of things you would like to see in these boxes. I would love to hear from you!

My Vintage Family

Friday Crafternoon: A little inspiration for your weekend!

IMG_8349

I love all kinds of paper crafting, but I just never have gotten into the scrapbook world. For one thing, I don’t take a lot of pictures of people. I wasn’t sure what the subject of my scrapbooking could be since I am lacking in that key element.

It wasn’t until recently that I began to put some pieces together in my mind. As I have talked about before, I love searching for interesting vintage photos to use in cards and shadowboxes. Old photos just seem to inspire me more than anything I take myself.

IMG_8353

I suddenly remembered two large boxes of old photo albums that my father and I had acquired years ago, after helping my Grandmother clean house before she moved. How could I have forgotten about those? Here I was, sitting on a goldmine of fabulous old photos, of people I was actually related to! Sometimes an idea is so obvious that you just miss it. So I picked them up from my parents house and began the task of sorting through and making copies.

IMG_20170309_191507_596

I am just in the beginning stages, but I really love it! And I feel a sense of accomplishment that I am preserving history and resurrecting these previously forgotten family moments. Even though my Grandmother went through these albums with us a bit before she gave them to us, I have already forgotten the the context for the many unlabeled photos. The feeling of responsibility to document all of these things for fear of loosing the information forever had loomed over me and seemed daunting. I am excited to have found a way tackle the project one step at a time and put my own creative spin on it. Now I weave my own handiwork into the tapestry of my family history, where the present meets the past and takes the form of something that I can pass on to future generations.

IMG_20170314_160001_496

I do plan to try to be better about taking my own photos to use, and I’m certainly not abandoning my fascination with old photos of strangers! This is just a way for me to branch out, putting my own spin on things as I go. It is so important to find your own style and forge a path for yourself. Don’t worry about making work that fits the mold of what “everybody else is doing” because that isn’t creativity. Our differences are what makes it unique! If you’re hesitant to try something because it isn’t your style, then I encourage you to find a way to make it your own. You just might like the results!

Are you a scrapbooker? What photos inspire you to create? I’d love to hear from you!

Thoughts on Acrylic Stamps

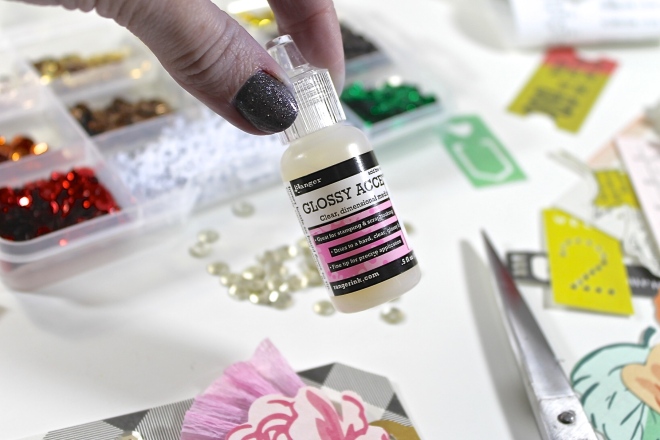
I am always on the lookout for a bargain, so I was thrilled to see the new value brand at Jo Ann Fabrics. It’s called Ms. Sparkle & Co. Paperie.

2017-03-09 12.33.48

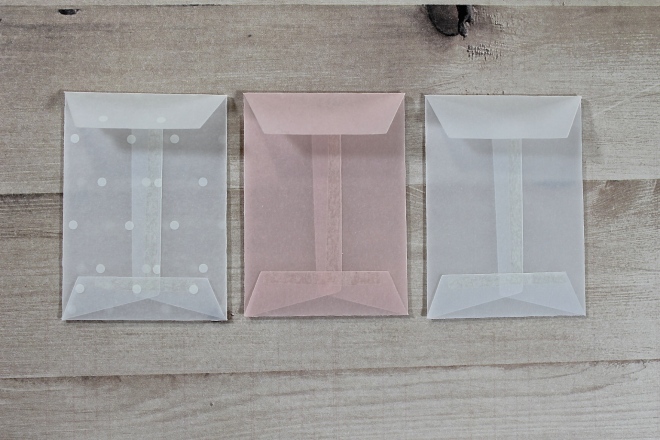
I was most interested in these bins where all of the products were $1.99, though I did see other products of the same branding throughout the paper crafting section at slightly higher price points.  As you can see in the photo, these products were also part of the 40% paper crafting supplies sale, and at the time of writing this there is also a 25% off coupon that you can stack on top of that! They have everything in these bins. Stickers, clothespins, tags, envelopes, notecards, paper pads in all different sizes, ink, stamps, twine, washi tape, and even adhesives!

2017-03-09 12.36.54

I immediately went for the stamps of course, and as my hands were filling up with one of each design, I paused. I tend to go overboard when it comes to stamps, especially these acrylic kind which are absolutely everywhere! I have certainly come across a lot of duds, so, as I reminded myself of this I decided to just buy my favorite one and try it out first. This is the set that I started with:

IMG_8311

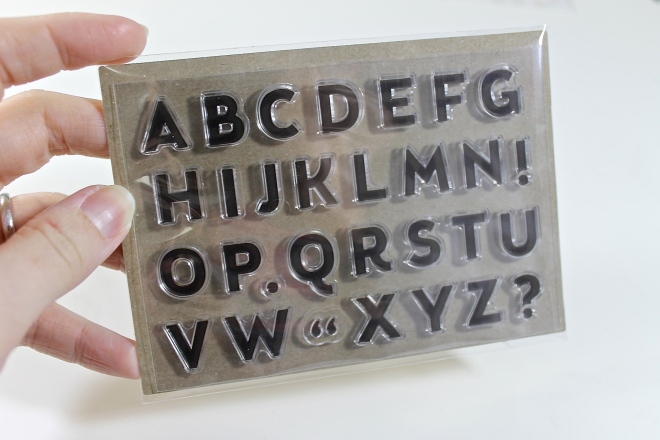
How could I resist this font!? I am a sucker for a good looking alphabet. I spelled out a few phrases and tried stamping with black dye ink as well as using a couple different embossing powders. I got crisp result with the embossing powder, but I felt that the dye ink came out a little spotty. This could just be because the stamps are new. I have noticed that acrylic stamps sometimes need a little breaking in before getting good ink coverage.

IMG_8315

IMG_8316

This was a fairly simple trial just to get an initial impression. I plan to keep trying them with different inks later on. Overall, I think these are a good purchase. The packaging and branding are clean and simple, which I really appreciate. You can’t beat the price and there are a lot of cute designs. I have already gone back to purchase more since trying these out.

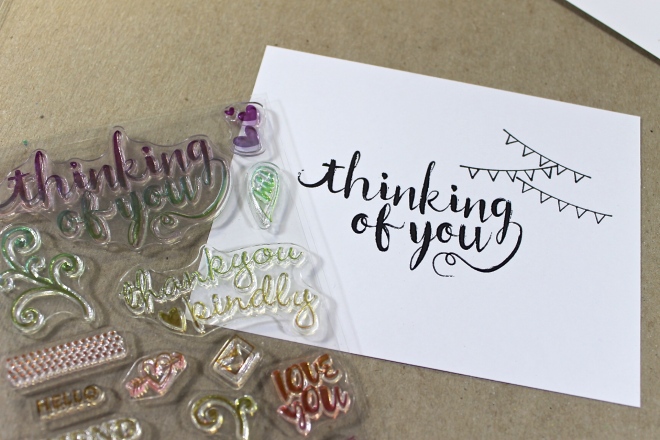
Now, let’s talk about Michael’s. Oh Michael’s, I really wanted to like your stamps, but they just are not what I expected. The Michaels brand is called Recollections. There are tons of different stamp sets, and they are cute! I especially like their latest collection in the planner aisle. However, right out of the gate I have a problem with the look of these stamps. Perhaps this is just me, but I have a very hard time seeing what the designs are because they have taken to this habit of printing all their packages in a rainbow. Take this stamp for instance.

IMG_8318

I had no idea until I stamped it that the words had a sketchy effect on the edges, because I couldn’t see it clearly on the package.

IMG_8319

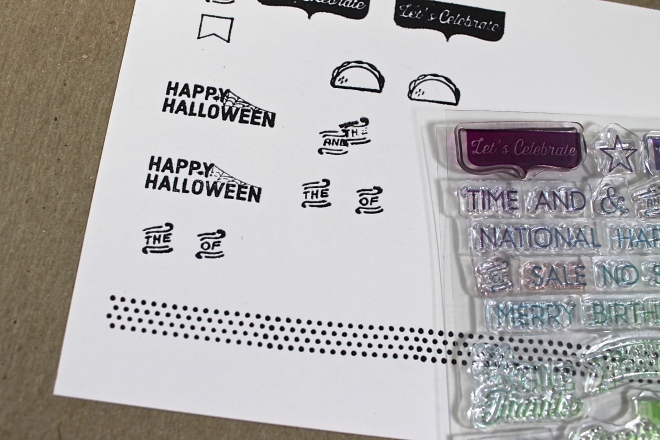
And the stamps in this holiday set are so tiny and detailed, even when I hold a white piece of paper behind it I find them difficult to see.

IMG_8323

Obviously packaging is not nearly as important as how they stamp, but that is a bit of a disappointment as well. I did not stamp every design from these two sets, but did try to get a good variety. The “thinking of you” sentiment came out pretty nice each time, but the rest were very sensitive. I have found that to get the best image, you need to be very gentle and just kiss the paper with it. Pressing firmly or unevenly at all creates a blob, and many of the images in the calendar set are so tiny that the details filled in with ink. The letters on this “Happy Halloween” were supposed to be outlines, and the “Let’s Celebrate” is barely legible.

TheRecollections stamps cost much more than the Ms. Sparkle ones, though they are sometimes slightly larger or come with a stencil or dies.

IMG_8324

It’s pretty easy to tell the difference between the quality of acrylic stamps when you hold them in your hand. The better the stamp, the thicker and firmer the acrylic will be. The problem is, you can’t really tell through the packaging, and if you are buying online you really can’t get a good look at them. I purchased quite a few sets on ebay from China for around $1 a piece. For the most part they were not good. The polymer was soft, cloudy, and uneven. Sometimes when a deal seems too good to be true, that’s because it is. I have really enjoyed using Lawn Fawn and Kelly Purkey stamps. They are high quality, and have amazing designs. There are a lot of other brands out there that I hope to try soon!

Have you tried any of the Ms.Sparkle & Co. products? What are your favorite value brands?

Fun With Vellum

Friday Crafternoon: A little inspiration for your weekend!

This week I’ve been playing with vellum. I’ve always loved the affect this material gives when layered over something, however I rarely incorporate it into my projects. It turns out that the Silhouette Cameo is very good at cutting vellum, so I’ve just been going to town making some really fun stuff! I hope you like it!

I started with an experiment to make envelopes, and after a few prototypes I came up with two different sizes – mini and itty-bitty.

img_8289

The itty-bitty are just the perfect size for my little flamingo die cuts. Adding some sequins turns these envelopes into a fun little shaker!

img_8294

img_8275

To make these envelopes, I cut a flat shape, then use a cardboard template and a bone folder to fold the flaps in.

img_8269

img_8270

img_8271

img_8272

A little double sided tape on the flaps, and there you have it!

img_8285

These envelopes are great for making a memorable business card presentation, or a fun way to give a gift card. I used a bit of fun washi tape on the back for easy opening and extra decoration.

img_8282

img_8280

As if the endless possibilities for the plain envelopes wasn’t enough, vellum comes in a wide variety of colors and patterns. How sweet is that polka dot one!?

img_8290

To fill in the negative space on my sheet when cutting I added some other fun shapes such as startburst medallions and flag tags. Both of these shapes combine well with a paper rosette and button.

img_8299

The vellum tags can be used by themselves, or layered with some cardstock. I used a simple eyelet to attach the two layers. Some of these items will probably be finding their way into my Etsy shop soon!

img_8309

What would you put in a vellum envelope?

Tell Me About Your Mother

Friday Crafternoon: A little inspiration for your weekend!

Today I finished up a shadowbox project that has been bouncing around in my head for a while. I have an ever growing collection of old photographs, which started somewhat by accident. Now I am always on the hunt for them! It’s fun to peek into their lives and imagine their stories. This particular photo came with no name, no date, just a simple “40 years” written in pencil on the back.

img_8185

In this photo centric age it is hard to remember a time when taking a photo meant something different. Now we can take take unlimited photos, see them, edit them, and print them right away, but I remember dropping off film, waiting, and being filled with excitement picking up my little packet of photos and hoping they turned out well. I definitely prefer the way things are now, but there is something to be said for these un-edited snapshots.

img_8149

I’ve been incorporating crepe paper into a few projects lately. I like to buy streamers since the paper is already cut to a manageable size for my tiny projects. To get the ruffles I sewed down the center of the strip, gathering as I went with the tension setting very loose. After I began to lay out the ruffles I realized that they echo the shape of her apron hem. It must have been a subconscious influence!

img_8148

I stacked two foam squares to get extra dimension and leave room for the ruffles.

img_8145

I wanted to add some shimmer to the doily peeking out from the top, so I turned to my Heidi Swapp Color Shine. I covered the entire doily and let it dry over night. It is so subtle, you can’t even tell in the photos.

img_8153

Of course I added in some washi and sequins, because I just can’t get enough! And yes, those are vintage barber scissors. I found them at the thrift store and they cut better than most crafting scissors I have tried. All metal, made in Germany, and still sharp.

img_8161

img_8164

A lot of my work is inspired by mothers. In college, my senior thesis exhibition was entirely focused on the subject. You may not have known your mother, or your grandmother, or her mother, but there is a story, there is a history. We all have a mother, and even though we may generalize or stereotype the role of “Mom” each of our experiences is unique. For better or for worse, they are who they are and it shapes who we are.

img_8167

Now, I don’t mean to downplay the importance of fathers. I was equally nurtured and supported by both of my parents, and I certainly take after both of them. My father always spoke fondly about his Grandmother and told me what a talented artist she was. I was given my middle name, Elizabeth, after her but perhaps that isn’t the only part of her that was passed on to me. My creativity and passion for crafting is a huge part of who I am, and that I attribute to my mother. As far back as I can remember we were crafters. If we saw something we liked, we would try figure out how to make it. If I showed interest in something she was doing, she would teach me to do it too. Not even out of necessity, but because we shared a passion for making things. I don’t ever remember being told I was too young to learn anything. I watched her constantly trying new things and teaching herself as she went and I adopted that practice as I got older.

img_8184

I am not a mother, but I still carry the legacy of all the women who came before me, not only in this family but in all of my life. Who was this woman? I may never know, but imagining her story becomes a mirror in which I reflect on my own story. What women have influenced you the most? I would love to hear your stories!

The Silhouette PixScan

Today I wanted to talk about something called the PixScan mat for the Silhouette Cameo. This is a way of taking an existing image and importing it into your Silhouette to cut it out. I got this mat because I really wanted to be able to turn my stamped images into die cuts without having to cut every image out by hand. This will be a simplified overview of how it works, and what my results have been.

The first time you use the PixScan mat there are some instructions you will need to follow to calibrate it. After that, the process is pretty simple. You place your paper on the mat, take a picture with your phone and upload it into Silhouette Studio. I have found that shiny images, especially metallic colors, are difficult for the silhouette to read, so keep that in mind.

2017-02-16-09-51-59

Once the photo is uploaded, you can use the trace function to generate your cut lines, and then you can manipulate them from there. I like to leave a little bit of a border around mine rather than cutting right to the edge of the image. There is an easy tool in Silhouette Design Studio called Offset that helps you do this.

screenshot-2017-02-16-11-08-01

Here you can see the difference between cutting to the edge and using an offset.

2017-02-16-11-33-58

When you are ready, choose your blade settings and cut it out.

2017-02-16-11-03-38

2017-02-16-11-03-47

2017-02-16-11-04-01

2017-02-16-11-04-04

2017-02-16-11-04-22

Some images come out better than others, and I haven’t yet mastered this tool. As you can see below, the flamingos turned out really well, but flower pot is way off.

2017-02-16-11-35-22

Have you ever used the PixScan mat? Share your tips and tricks below!

One Swell Project

Friday Crafternoon: A little inspiration for your weekend!

valentine-title-01

This week I have been hard at work making a batch of valentines to give to my co workers. It has been ages since I handed out valentines, or even really cared much at all about the day, but working at Paper Source has really made every holiday extra fun! I love being part of a group of people who jump at any chance to celebrate and get crafty.

img_8042

I started out by cutting two types of hearts with my Silhouette Cameo – one with slits for the arrow (the front) and one plain (the back.) I then ran all of the front pieces through my embossing machine with the Stitches Cover Plate from Ellen Hutson. This background die is so incredibly detailed! Then I glued the front and back together and inserted the arrows.

img_8047

The featured photos were cut out of an old yearbook that was just begging to be repurposed. The hair and outfits on these boys are truly something to swoon over.

img_8058

Such a dapper bunch!

img_8065

I added a few enamel dots to embellish, and a little of the Ranger Glossy Accents that I mentioned last Friday. On the back I adhered a small sentiment that I typed up on my lovely vintage typewriter.

img_8110

img_8083

The packaging is where I had the most fun of course! I used a combination of stamps and stickers to add extra detail to these wonderful vintage envelopes. I have been hanging onto them for years just waiting for the perfect project.

img_8084

img_8100

I believe I only paid $1 for this wonderful old stamp set from the thrift store. Clearly it has a rich and colorful history. It’s weathered look is part of the charm. The box is quite unassuming, but the large title “PRINT SET” managed to catch my eye from its misplaced spot on the shelf of puzzles. Even more shocking – all of the letters are there!

img_8094

img_8108

The stickers themselves are not vintage, but are made by a company called Cavallini, which gets their artwork from items in their drool-worthy archive of vintage miscellany. They really do an amazing job. It’s almost like having the real thing!

img_8121

These envelopes were too old and wonderful to ruin by sealing the flaps, so I used a little bit of bakers twine. It is the ultimate finishing touch!

img_8123

And off they go to be delivered!

img_8132

I hope you enjoyed this week’s project. Did you make a Valentine for anyone this year? Come back next week for another fun project!

Friday Crafternoon

A little inspiration for your weekend!

This week I have been working on some fun floral tags. Tags are a great way to use little bits and pieces from your collections or leftover scraps of paper after another project. I love to have some already made tags on hand in case I need to put together a quick gift. They make it so easy to dress up any package or bag!

img_7978

For these tags I pulled some elements from two different Maggie Holmes ephemera packs, along with some labels from my Dymo, Studio Calico stickers, and some other bits and pieces I have stashed away.

img_7960

img_7958

img_7963

I wanted to add some tiny details to really make this piece shine! This is where the Ranger Glossy Accents come in.

img_7967

This is a clear liquid that you can use to create droplets in any size you want directly on your project to add dimension and shine.

img_7971

To add some sparkle to the flower, I always reach for my Wink of Stella brush pen. It has a very fine tip so you can make precise lines. I just filled in a few areas on the flower rather than covering the whole thing, but you could easily do either with this tool.

img_7968

img_7970

I used the same techniques on this second tag, but tried to keep this one a little more simple.

img_7974

Have you used any of these products before? What is your favorite way to embellish your projects?

Come back next Friday for a vintage inspired Valentine’s Day project!